REVIEW · MAUI
Epoxy Resin Cheese Board Art Class
Book on Viator →Operated by Yulia Maui Art · Bookable on Viator
A resin cheese board class with ocean vibes sounds like a craft fair, but the payoff is real: you’ll learn the process and leave with serving-ware you can actually use. This workshop in Maui mixes practical resin technique with a relaxing change of scenery around Paia and Ho’okipa Beach Park.
I especially like that it’s truly hands-on and structured around safety, measuring, mixing, coloring, and finishing. I also like the teaching style, because the instructor stays with you step by step. One thing to consider: resin work means you won’t have a finished board in hand immediately since it needs curing time.
In This Review
- Key things to know before you go
- Ocean Resin Cheese Board Class in Maui: the real point
- Paia to Ho’okipa: how the day is paced
- What you learn in 90 minutes (and why it’s not just a craft)
- The main pour: measure, mix, color, and pour
- Board prep: cleaning, taping, leveling
- Heat gun and torch techniques (plus why PPE isn’t optional)
- Curing and pickup: plan for a next-day finish
- What you’ll take home: cheese board plus a board set vibe
- Price and value: what $145 buys you on Maui
- Who should book this class
- Things to consider before you sign up
- Should you book Yulia Maui Art’s epoxy resin cheese board class?
- FAQ
- Where is the meeting point?
- How long is the epoxy resin cheese board class?
- How much does it cost?
- What will I make during the class?
- What’s included in the experience?
- Is alcohol included?
- How long does the resin take to cure, and when do I pick it up?
- How large are the groups?
- Is there free cancellation?
Key things to know before you go
- Small group size (max 12) helps you get real attention, not just a quick demo.
- PPE included (gloves, aprons, and safety gear) means you can focus on art instead of gear hunting.
- You’ll practice first with a mini board, so your main ocean pour feels more confident.
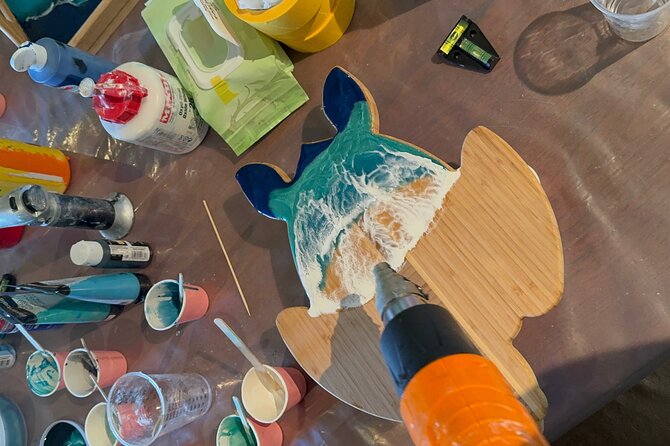
- Expect to use heat gun and torch techniques, with safety guidance built into the class.
- Your serving boards cure for 24 hours, with collection the next day.
Ocean Resin Cheese Board Class in Maui: the real point
If you’ve ever bought a charcuterie board that looks great but feels too fragile to actually use, this class is a better plan. You’re making a resin serving piece meant for weekend entertaining, casual snack nights, and gifts that come from your hands, not a shelf.
What makes this experience work is the balance: you get technique, not just vibes. The workshop covers how to measure, mix, color, and pour epoxy resin correctly, how to choose pigments and blend colors, and how to finish the surface so it looks polished. That turns an art project into a skill set you can reuse later.
And because this is set up for an ocean-style look, you get to think in layers and motion, not just paint. Ocean resin boards tend to look deeper the more you pay attention to flow and color mixing. This class gives you the steps to get there without guessing.
Paia to Ho’okipa: how the day is paced
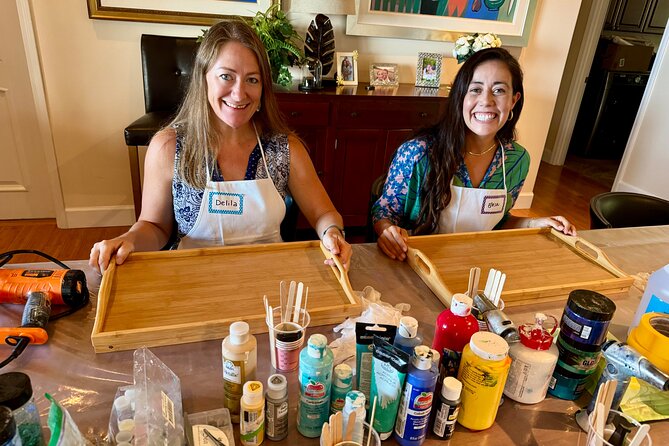
Your day starts at 24 Luna Ln, Paia, HI 96779, and it ends back at the meeting point. The schedule is built around two named stops: Paia and Ho’okipa Beach Park.
Here’s why that matters. Paia is a lively, walkable Maui base with a creative feel, so showing up early for a craft session doesn’t feel like you’re driving into a remote workshop with zero local energy. Then Ho’okipa Beach Park brings that ocean focus that fits the resin theme. Even if your real instruction happens in the work area, the change of scenery helps you stay mentally fresh during a hands-on session.
A practical note: the experience runs about 1 hour 30 minutes total (approx.). That’s not a long time, so arriving on time helps. Resin classes move fast, because the process has steps you can’t rush.
What you learn in 90 minutes (and why it’s not just a craft)
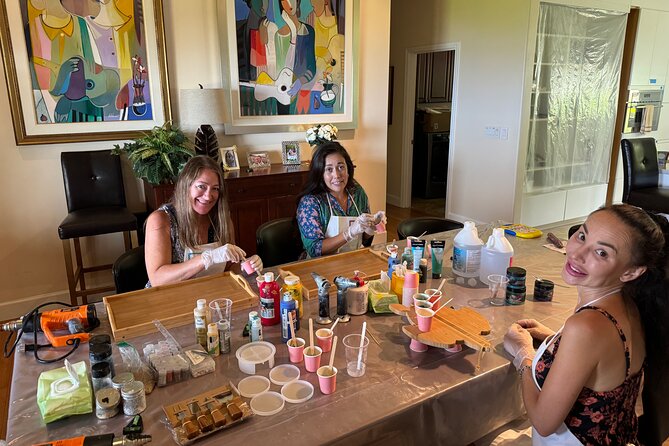
This isn’t a casual paint-night where you copy a sample and hope it turns out. The class is built around a clear workflow—from prepping your board to finishing the cured surface.
You’ll cover core resin skills like:
- Safety and preparation tips before you start mixing
- How to measure resin and mix correctly
- How to add color and blend pigments
- How to use a heat gun and torch for effects and texture control
- How to prep your board with cleaning, taping, and leveling
- How to finish professionally
- How to look after your new serving ware after curing
For most people, the biggest win is learning the invisible parts. Resin looks simple from across the room, but the real differences come from accurate mixing, clean surfaces, and careful leveling. This workshop gives you those details so your board has a more consistent finish.
And the mini practice piece is smart. You get a smaller board to build muscle memory for mixing and pouring, which lowers the stress when it’s time for your main serving board.
The main pour: measure, mix, color, and pour
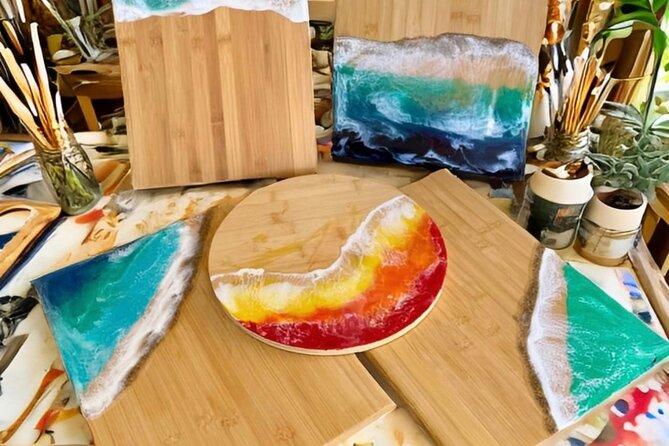
Your centerpiece project is a resin cheese board (ocean-style). You also make a mini cheese board to practice the techniques first.
You’ll work on a process that usually goes like this: clean and prep the board area, tape and level so the resin sits where it should, then measure and mix resin. After that, you add pigment. Color blending is where the ocean look often comes alive, because you’re not aiming for flat color—you’re aiming for depth.
The class specifically covers:
- how to measure and mix
- how to choose the right pigments
- how to blend colors
- how to pour in a controlled way
What you’ll likely appreciate is that you’re not doing this blindly. The instruction is step-based, so if you’re worried about messing up, you get guidance during the steps that matter most.
Also, the class supports personalization. You can bring your own board shape if you want something specific for your home display. If you want a special shape option, upgrades are available during class time, but the default approach is that you’ll create something you can actually use.
Board prep: cleaning, taping, leveling
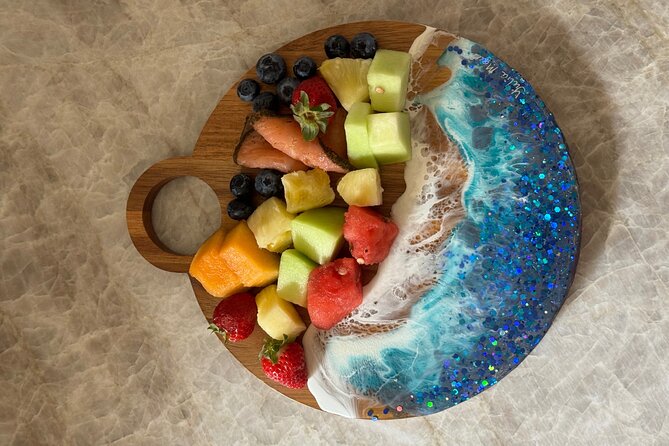
A resin pour lives or dies on prep. If the surface is off, or the edges aren’t protected, your finish won’t look as sharp.
In this class, you’ll learn how to prep your board with:
- Cleaning (so resin adheres and doesn’t react weirdly)
- Taping (so edges and boundaries are clean)
- Leveling (so the resin sits even)
This part might sound technical, but it’s exactly what makes the finished board feel professional. A lot of DIY epoxy failures are really prep problems. Here, you’re coached through it so you’re setting yourself up for a smooth cure.
Heat gun and torch techniques (plus why PPE isn’t optional)
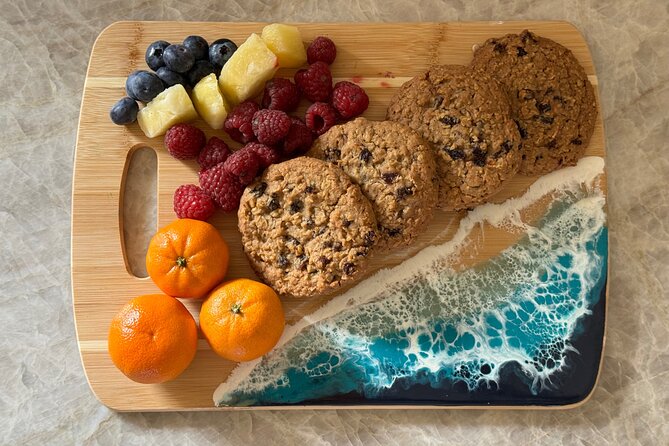
Resin art often includes heat tools. You’ll use a heat gun and torch as part of the effects and finishing process. That’s where you can get interesting results fast—like helping bubbles react, controlling surface movement, or refining the look after your pour.
This is also where the safety gear matters. The class includes gloves, aprons, and other PPE, and it covers safety and preparation tips before you start. You should expect to be paying attention to handling and timing with those tools, because epoxy reactions and heat effects don’t wait for you to get comfortable.
If you’re someone who likes clear rules, this setup will feel reassuring. You’re guided on the how and the why, not just handed tools and told good luck.
Curing and pickup: plan for a next-day finish
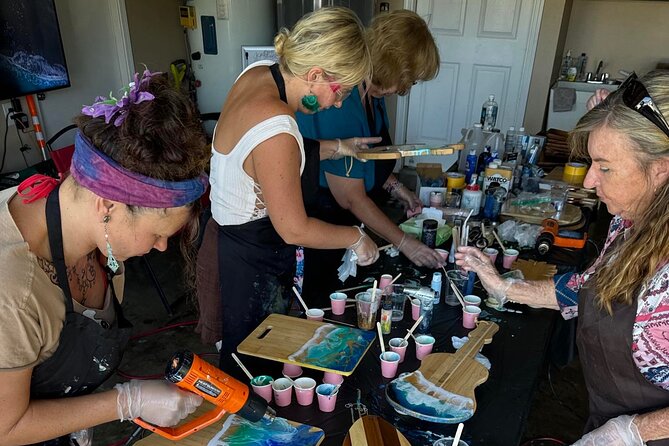
Your completed resin serving ware needs time to cure. The workshop sets expectations clearly: the boards take 24 hours to cure and are ready for collection the next day.
That means this experience is a two-step commitment. You make it today, then you pick it up tomorrow. If your Maui schedule is tight, put that next-day pickup into your planning so you’re not scrambling.
The good news: because the cure happens after you leave the work area, you can rest assured you’re not sitting through a long waiting period during your class time. You use your 1 hour 30 minutes effectively, then the resin does its quiet work.
What you’ll take home: cheese board plus a board set vibe
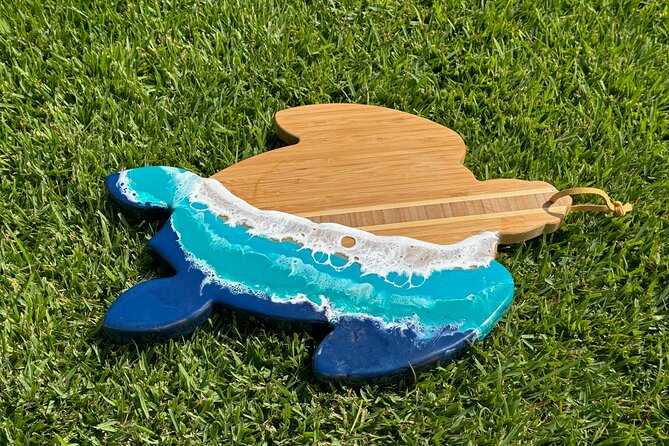
The experience is set up for weekend entertaining and gifts, so you get more than one surface. Included in the class are:
- Resin cheese board
- Charcuterie board
- Chopping board
In the making process, you’ll create a main cheese board and a mini cheese board for practice. Those elements line up with the idea of building a board set you can use for snacks and serving.
This matters because a cheese board is only half the story. When you also have a charcuterie-serving piece and a chopping board included, your setup becomes complete: cut, arrange, serve. Instead of buying multiple items later, you’re starting with a cohesive set from one experience.
Price and value: what $145 buys you on Maui
At $145 per person, this class isn’t a cheap souvenir. It is a paid lesson plus materials, and that’s the point.
Here’s how the value adds up:
- You get structured instruction on resin technique (not just a guided craft vibe).
- You get PPE included, plus supplies for resin work.
- You leave with a resin serving piece and additional boards included in the package.
- Your session time is compact, so it respects a limited vacation schedule.
Also, it’s often booked well ahead, with average bookings happening around 50 days in advance. That suggests demand for an experience that’s both fun and useful—people want to go home with something that isn’t just a photo.
If you’re the type who enjoys craftwork and also likes using what you make, the price feels more justified. If you only want a quick activity with no interest in technique, it may feel like more effort than you expected.
Who should book this class
I’d put this in the sweet spot for people who:
- want a memorable Maui activity that ends with something you’ll use
- enjoy making gifts that feel personal
- like guided instruction and hands-on learning
- are interested in practical resin skills like color mixing and surface finishing
It also fits couples and small groups well because the workshop has a maximum of 12 people. Smaller groups tend to mean you get more help when you’re at the step that matters most.
If you’re traveling with kids, it says most people can participate, but it doesn’t spell out ages or youth policy. If that’s your situation, confirm directly when booking so you don’t show up expecting a perfect match.
Things to consider before you sign up
A few practical points to think about:
- Cure time and pickup: you’ll need to return the next day to collect the cured board. Plan around that.
- Fast pace: the class is about 1 hour 30 minutes, so you’ll want to arrive ready and on time.
- Board shape upgrades: most shapes are handled within the class setup, but special shape options require an upgrade at class time. If shape matters to you, decide early what you want.
- BYOB option: alcohol isn’t included, but you can bring it. If you do, follow whatever comfort level you prefer since you’re working with resin and heat tools.
On the upside, the instruction style here is clearly built around support. People found the instructor very nice and helpful through each step, which is exactly what you want for something technical.
Should you book Yulia Maui Art’s epoxy resin cheese board class?
If you want an activity that’s more than a one-time craft, I think this is a strong choice. You’ll learn real technique—measuring, mixing, pigment blending, prep, heat-tool effects, and professional finishing—and you’ll take home serving boards that fit real life at home.
This is especially worth it if you love the ocean aesthetic and like the idea of making something you can bring to the table for cheese, antipasto, and weekend hosting. If your schedule can handle a next-day pickup, and you’re excited by hands-on resin work, I’d book.
If you hate waiting for cured items, or you want something you can finish and take immediately, you’ll probably feel constrained by the 24-hour cure.
FAQ
Where is the meeting point?
You’ll start at 24 Luna Ln, Paia, HI 96779, USA, and the experience ends back at the same meeting point.
How long is the epoxy resin cheese board class?
The duration is approximately 1 hour 30 minutes.
How much does it cost?
The price is $145.00 per person.
What will I make during the class?
You’ll make an ocean resin cheese board and also create a mini cheese board for practice.
What’s included in the experience?
Included items are resin cheese board work, a charcuterie board, a chopping board, plus bottled water and juice and water during the class. Gloves, aprons, and other PPE are also included.
Is alcohol included?
No. Alcohol is not included, and you can BYOB if you want.
How long does the resin take to cure, and when do I pick it up?
The serving ware set takes 24 hours to cure and will be ready for collection the next day.
How large are the groups?
The class has a maximum of 12 travelers.
Is there free cancellation?
Yes. You can cancel up to 24 hours in advance for a full refund.